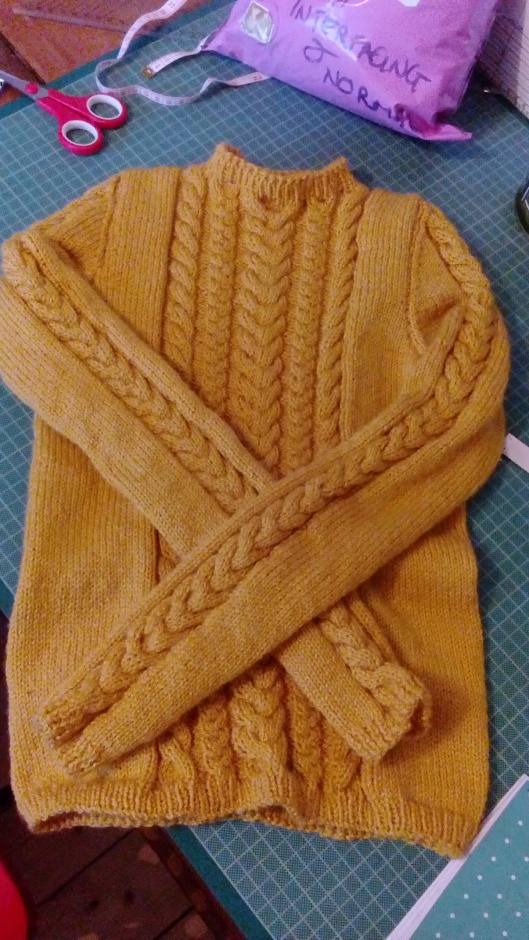
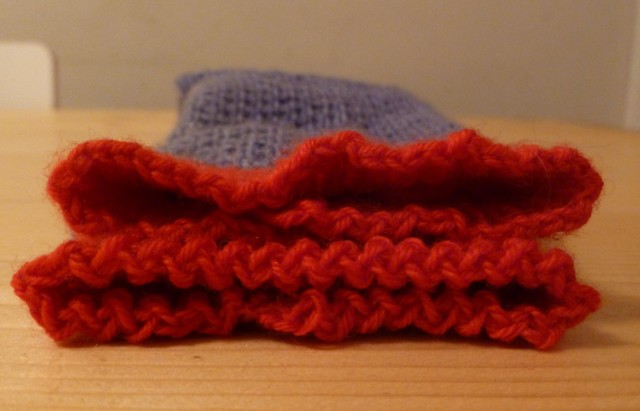
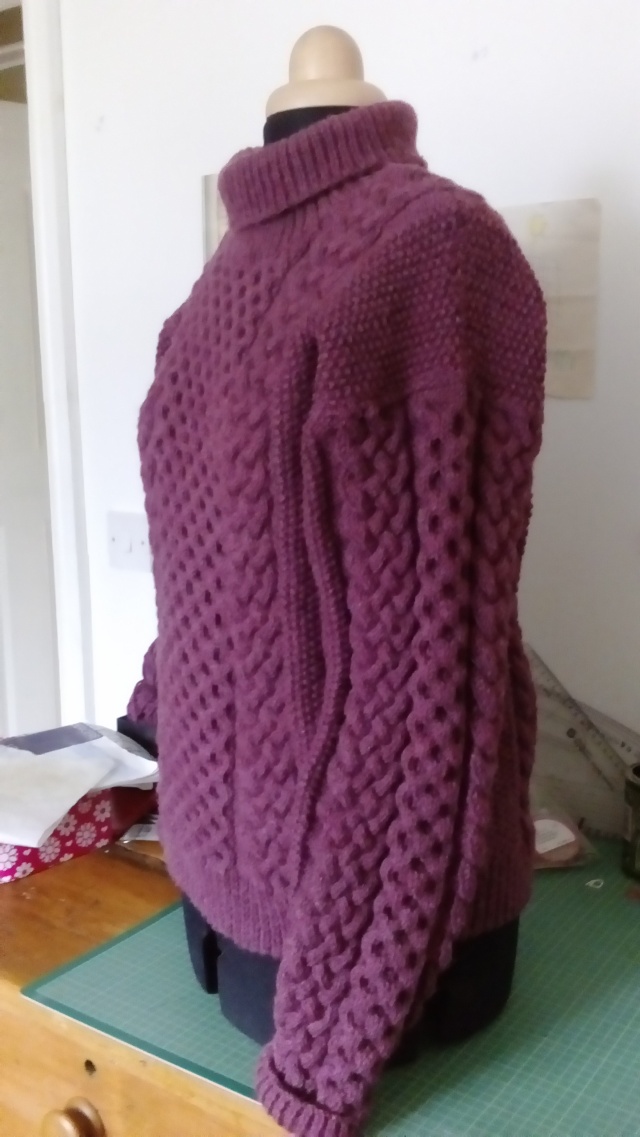
Another EZ Colour Work Yoke Sweater Plus Discovering Chart Minder

This was finished before Christmas and I planned to have this written up in January….never mind!

Once I had completed my first EZ yoked sweater I just wanted to do another one. I find that I just love colour work.

The colours of this jumper were inspired by a friend’s fair isle cardigan and I knew that I wanted a blue base. I chose to use an 100% wool  yarn this time and chose a King Cole DK quality. It’s one of the less expensive all wool yarns, the sweater has had quite a bit of wear and does already look slightly pilled in areas so I’m not sure I would chose this again.

blue yoke sweater (1824 x 1368)

For the colour work design I copied a chart from a knitting magazine I had. I had been looking for inspiration on-line before I remembered seeing a fair isle design in the Aran pattern book I had bought the previous year.

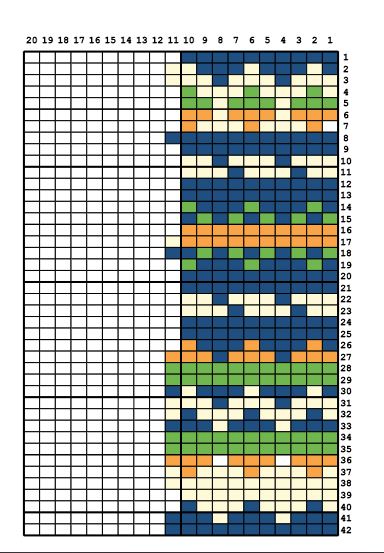
But whilst looking on-line I came across this great resource for colour work designing. Chart Minder. I had printed out some squared paper for myself to fill in with my design fully expecting it to be quite time consuming. But with Chart Minder you can do it all on the computer – adding colours to the squares, inserting rows – deleting rows etc. It took a little bit of time to get used to, especially when trying to add a row in but I got there and printed out my design.

fairisle chart

The design I created in Chart Minder


I found that the front neck on my first sweater was slightly too high so I counted how many rows of colour work were in that sweater and took off about 5 or 6 rows in the design for this one.

I was really happy with the fit on the body of the first sweater so I wanted to create the same size. I knitted a tension swatch but for some reason I decided to err on the side of caution and and added in a few extra stitches as I didn’t want it to be too small or if it shrunk when washed – which then once I knitted the body thought it was too wide – the circumference is around 3-4″ larger than the first sweater.

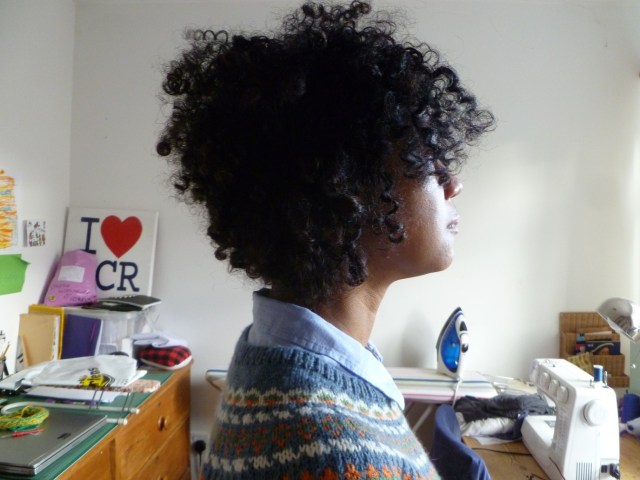
When knitting the colour work I did two rows of decreasing and I also knitted short rows across the back to to build up the neck. On my final row I did a little bit of decreasing on the back neck only. With regards to building up the back neck I read a post from Karen at Fringe Association where she mentions that if she knitted another colour work yoke sweater she would knit the short rows before the colour work. This would give you the look at the neck of the colour work pattern sitting the same distance underneath the rib all the way around. You can see from the picture below of my sweater that there is much more blue underneath the neck ribbing at the back. I don’t mind this but knitting the short rows under the yoke is an interesting idea.


side shoulder view (1824 x 1368)

Photo shows the building up of the back neck by working short rows across the back only.

I was on the home straight of knitting this when I suddenly went off it. I was annoyed with myself for knitting it too wide and then I also went off the colours I had chosen. My friends cardigan was lovely but I’m a different colouring and instead of thinking of what suited me I went for a group of colours that looked good together but not necessarily on me. There were a lot of ends to weave in and I nearly didn’t bother but I pulled myself together and got on with it!

OK, it’s note the fit I set out to knit and I need to wear a shirt underneath to give it the look I want and the colours have grown on me. It’s had loads of wear over the last few months and I wanted to start knitting another one straight away but I managed to control myself and maybe wait to later in the year in time for next autumn.

Rosetta Girls Cable Sweater

Not much has been happening around here, the family bereavement early last summer and the looming redundancy have put a real drain on my creativity. I can knit but I can’t sew. It’s funny because I used to favor sewing over knitting as I want the quicker results from sewing.  I suppose with knitting I can pick it up and watch TV and I can do as little or as much as I like without having to set anything up. I have a half made shirt hanging on the back of my sewing chair, I just can’t find the enthusiasm to finish it at the moment but in that time I have knitted two jumpers.

2017-11-17 11.41.32

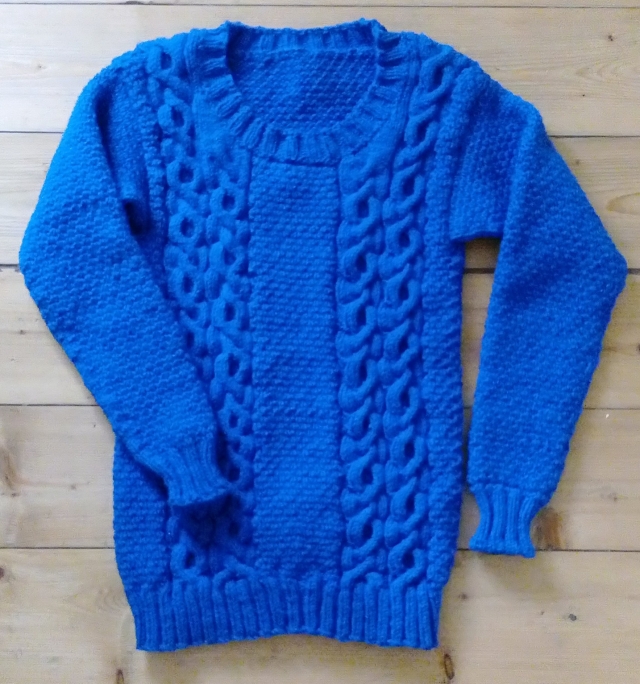
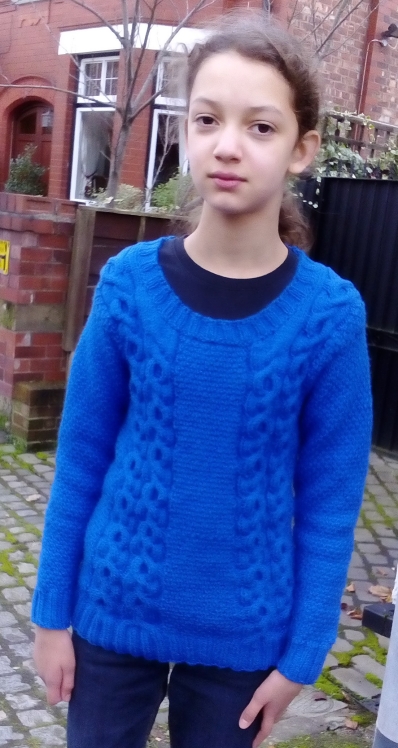
The first was for my daughter. She had wanted a cable knit and I had found this pattern previously. I couldn’t face spending months on a complicated aran jumper like I did last autumn but this looked good as it just had a cables on the front and the rest of the body had a texture. The pattern is called Rosetta. Which I downloaded from Lovekntting.

Somehow I just presumed the yarn would be aran and went ahead and ordered Paintbox Aran in sailor blue from Love knitting without reading the pattern. The yarn should have been worsted weight so my gauge would be right out if I followed the pattern. I knitted a swatch and worked out that if I followed the amount of stitches for the smallest size 24″ – it would work out at 32″ which was what I needed.

The jumper is knitted from the hem up on circular needles up to the armhole. Then the top of the front and back are knitted in turn. Then to knit the sleeves the shoulder seams are sewn up and then stitches are picked up around the armhole and knitted in the round down towards the cuff. I really liked this approach, I don’t enjoy seaming knitting so this was perfect.

2017-11-18 13.48.21

Starting this just didn’t go to plan. The texture is knitted in a basket weave but I just couldn’t get it! I couldn’t see that I was going wrong until a couple of rows past the mistake so I decided to give myself a break and try a different stitch. On the arran jumper I knitted last year the texture I used was moss stitch – also called seed stitch. This can be quite time consuming and can give quite a solid fabric so I remembered that I once used ‘broken seed stitch’ on a pair of socks. This adds a knit row in-between the rows of knit / purl stitches. So that was what I used.

Then the cables gave me a headache – I just couldn’t get them right. So there was a bit of unraveling to start with. I was reading the pattern but then I found that looking at the chart made more sense. I cut out the chart, made it into one long strip and I highlighted the ‘cable left’ and the ‘cable right’ in different colours and finally this worked for me. I needed to keep the chart handy at all times.

2017-11-17-11-42-151.jpg

With the sleeves and the neck there was no indication on the pattern of how many stitches to pick up to knit so that was a bit of guesswork. I also found that the sleeves took longer to knit than expected and I think that had something to do with having the garment in your lap and having to twist the whole garment around when knitting. I used a circular needle for the sleeves until they got too narrow then swapped to DPNs.

The sleeves were designed to be 3/4 length, it’s not quite clear in the photo how long they are as the model is photographed with arms down but neither myself or my daughter liked this look so I knitted them full length.

It knitted up fine and I got the width that I wanted, for the length of body and sleeves I knitted to the measurements that we wanted.

The Paintbox Aran yarn is ok, during knitting I was wondering if I should have spent a bit more but it’s turned out fine and really I don’t want to spend too much when I’m not sure much it is going to get worn. If I was knitting for myself I think I I’d choose a better quality yarn.

But anyway, I enjoyed knitting this and was a challenge to get up to the shoulders without a mistake in the cables!


Elizabeth Zimmermann Colour work Yoke Sweater.

You may remember that back in May at the time of my last post my enthusiasm for anything craft related had left me. A family bereavement and notice of redundancy had really got me down. I did make a skirt in June but it’s not been worn mainly due to the miserable summer weather.

One thing that did get me enthused was Kate who blogs at Fabrickated and her adventures in knitting. Back in July Kate started a knit along to make an Elizabeth Zimmermann colourful yoked sweater. I decided to join in after I returned from holiday in August. Even though I couldn’t face sewing I felt I could get some pleasure out of giving this ago. I had never tried colourwork before so it was going to be a challenge.

To start with let me direct you to this post of Kate’s where she showcases some of the finished sweaters knitted by her readers. At the bottom of her post there is a link to all the 6 weekly posts in the knitalong. In these posts you’ll find everything you need to know if you feel like taking up the challenge.

The book Kate has been following is Elizabeth Zimmermann’s “Knitting without tears”. I found myself a second hand copy on Amazon for just over £5. The book was as new and looked like it had never been used. It has an inscription inside. Judging by the immaculate condition it was in I don’t think Amanda made any use of the present given to her by Irene. You don’t need the book as every thing you need to know is detailed in the knitalong posts.

2017-09-08-11-10-55.jpg

It took me a while to decide on colours. Kate had done a great post on choosing colours and I loved the selection with the red and orange so this is the path I took.

I settled on a mid grey for the main colour and chose red, orange & taupe for the 3 colours in the pattern. I took ages choosing the quality of wool. For my first attempt I didn’t want to spend too much but neither did I want 100% acrylic. I choose a Stylecraft DK 75% acrylic 25% wool and the cost came in under £20. In fact I had bought more than I needed and was able to send 200gms back for refund out of the 500gms that I original bought in the grey.

So before I started I needed to learn how to do the colourwork. The advice on knitting colourwork is to knit on circular needles on the round so you are only ever doing a ‘knit’ stitch. So I cast on enough stitches for a 50cm circular needle which was the smallest length I had. EZ recommends that you learn to knit ‘continental style’ which is holding your yarn in the left hand. This then enables  you to have a yarn in your right hand and one in your left hand and the two balls of yarn will never get tangled. To learn the technique I found Knit Freedom which has great YouTube videos. I slowly got the hang of using my left hand – which feels very strange when you have only ever held your yarn in the right hand. Then once I had done a few rounds I started on the colourwork. Again Knit Freedom had a video tutorial.
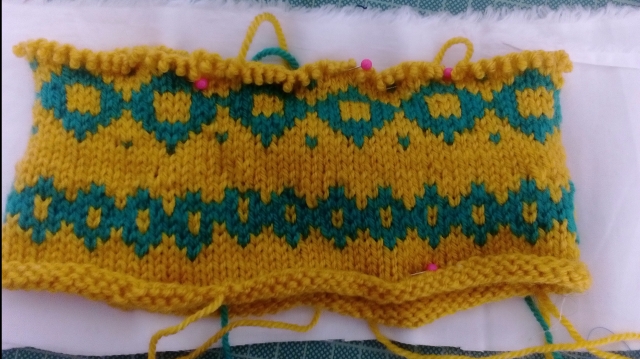
2017-09-08-11-09-45.jpg

So once I’d go the hang of the colour work and my yarn had arrived from Love Knitting I started by knitting a square to measure the gauge. It’s recommended that you test the gauge on the circular needle but I used single pointed as I didn’t want to knit more than necessary and I just wanted to get started on the real thing. My gauge worked out as stated on the label for the DK using 4mm needles. Once I’d worked out the maths for how many stitches I needed I started by knitting a rib. EZ adds on ribs for cuffs and hems once the garment is finished but I felt happier doing this first.

I knitted up to the armhole depth then I started on the sleeves. I knitted the whole length of the sleeves using 4 double pointed needles. The sleeves are shaped by adding a stitch either side of the underarm line every 5 rows until you have your required number of stitches – which is worked out as a percentage of the body stitches.

Once the sleeves are up to the armhole point the body and sleeves are joined together leaving a number of stitches at the underarm points on both the sleeves and the body. Then the fun starts with the colour work on the yoke.

2017-09-08 20.00.35

For simplicity I followed the pattern design in the book. it is a repeat over 4 stitches. Two points EZ makes about colour work is to only use 2 colours of yarn in a row and don’t carry the yarn more than 5 stitches. I did two rows of the orange circle as I really liked the colour and wanted more of it. The taupe didn’t work so well as the contrast between that and the mid grey is not so noticeable. But it’s not terrible. When I started the red colourwork it was taking about half an hour to do one circuit which was about 250 stitches, I did my first decrease after the red which reduced the stitches by about 1/3 so the orange knitted up faster.

One step to do before finishing is building up the back neck. This makes sense as on most garments the back neck is higher than the front neck. This is done by working ‘short rows’. 1 had 100 stitches around my neck. I worked on just the back 50 then picked up another 2 at the end of the first row then turned and knitted back picking up 2 stitches at the other end. I did this for 6 rows.  I chose to do the building up in stocking stitch the same as the body of the jumper but you could incorporate it into the rib.

P1060025 (1824 x 1368)

this is a photo of the right shoulder, you can see how the back neck has been built up.

I finished off with 5 rows of 1×1 rib then cast off. Twice. First time I cast off I started to the front of the left shoulder and when you knit on the round you get left with a step at the join. So I undid the cast off and took it back to the back of the left shoulder and started again.

2017-09-09 10.40.32

Cast off tail too far towards the front of the neck.

I read up about ‘blocking’ the jumper. I found conflicting advise over blocking acrylic some said no need, others said it should be done. But as this has 25% wool I went ahead. So I thoroughly wetted my jumper in warm water then put it between towels and rolled to get rid of excess water. Finally I pinned to a towel setting the chest and hem width. I’m no expert but I think this has worked OK.

P1060024 (1824 x 1368)

Yoke area after the blocking, you can tell that the stitches are laying flatter and smoother than in the photo with the cast off tail pre blocking.

The size has turned out exactly as I wanted. The body width is perfect, I wanted 34″ and got it. The sleeves are the right length and fit. I’m reasonably happy with the neck, maybe it could have been a bit lower and a little bit wider. But as a first attempt I am really pleased with this. Thank you Kate for inspiring me and many others to give this a go.I now understand colourwork and have got to grips with Continental style knitting.

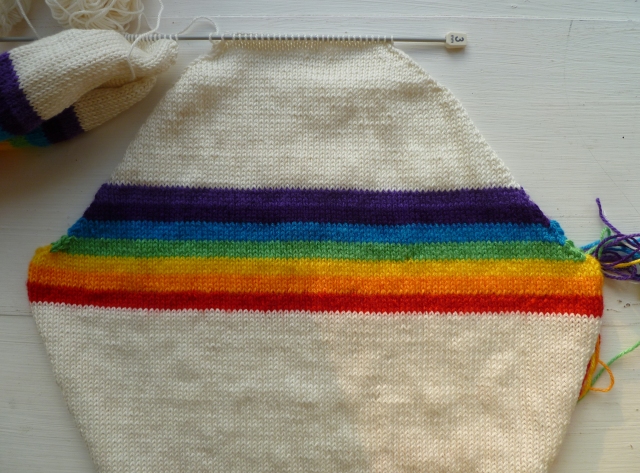
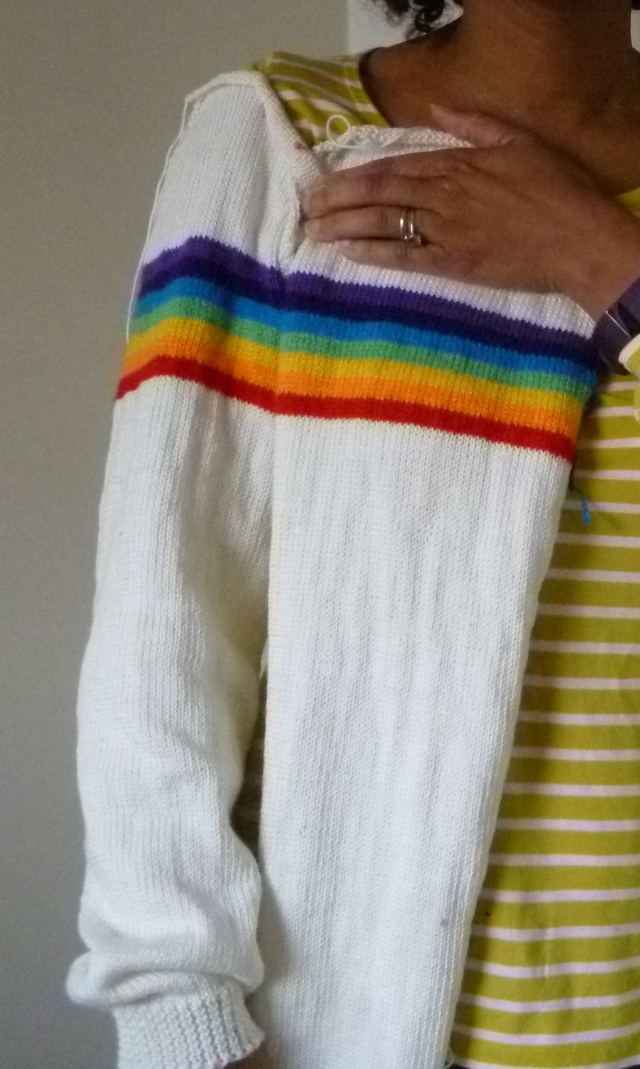
Anyway…….You may remember that I was knitting a white jumper with a rainbow stripe running across the sleeves and chest. The enthusiasm waned after knitting the sleeves which have ended up too long. But I have knitted the back to the stop of the stripes. In fact I had knitted up to the beginning of the shoulder decrease when I decided the body was too long so I ripped it back and took away 5cm from below the stripes. I wish that I had known the EZ method of knitting a jumper before I started. I’m toying with the idea of starting again but using the method for the colourwork yoke sweater. I may just start on a sleeve and see how it knits up. Sounds a bit mad as I am nearly 3/4 there. Any thoughts?

 

Rainbow Sleeves Completed – Then Completely Losing The Will To Do Anything Craft Related…..

Back at the end of April I mentioned I was a week away from completing the sleeves to the rainbow striped jumper I was knitting. I got these finished at the beginning of May and then the rest of the month was rubbish.

My 86 year old father went into hospital on the 2nd May. He had many health issues and sadly I wasn’t expecting him to come home. It’s an 80 mile round trip to my parents home and the hospital. Combining the visiting with my mothers health problems, working and two young children it was quite a stressful time. He died on the 19th May.

Then as the world knows my home city of Manchester suffered the horrendous terrorist attack on the 22nd. Thankfully nobody I know was injured but I returned to work yesterday to find out that the sister, brother-in-law and 8 year old niece of a colleague were injured.

Then to add to the general low mood we were told on the 25th May that the office I work in is to be shut down and relocating to another area of the country. As a family we are not wanting to relocate, it’s further north for a start and further away from extended family. So it looks like redundancy for me. We haven’t been given a time scale for the shut down but likely to be early next year. I have been in this job for 13 years and the thought of going to interviews and starting somewhere new is really scary.

So I have completely lost the will do anything. I don’t feel like picking up the knitting, I have two pieces of fabric I planned to sew but can’t muster up any enthusiasm.

Back to the jumper. I don’t know how I feel about it. Knitting with the sport weight wool on 3mm needles is just a drag. It takes so long. I’m not sure that I like what I have knitted. But looking at the photos I took a few weeks back I think it’s not that bad. But I don’t feel excited enough to continue knitting.

rainbow sleeve

Frustratingly the sleeves are a few cms too long as well. I not sure that I want to spend another 6 weeks (at least) knitting the front and back and then still not really liking it. I also under estimated how much yarn I’d need for the stripes. I bought one of each colour 10gm mini ball thinking that would be fine but I it looks like I’ll need to buy another set.

rainbow jumper sleeve on body

I’m away next week with work so I’ll see how I feel when I get back. The thing is that I know that immersing myself in some making will be good for me but it’s just getting started….

Beginning A Rainbow Striped Jumper

I had mentioned during the post for the last jumper I’d knitted that I’d seen a photo of Jools Oliver in a recipe book wearing a white jumper with rainbow stripes across the chest. I really liked the look of this and wanted to knit something similar for myself. I found out the original jumper is from Chloe with the price tag of £465.

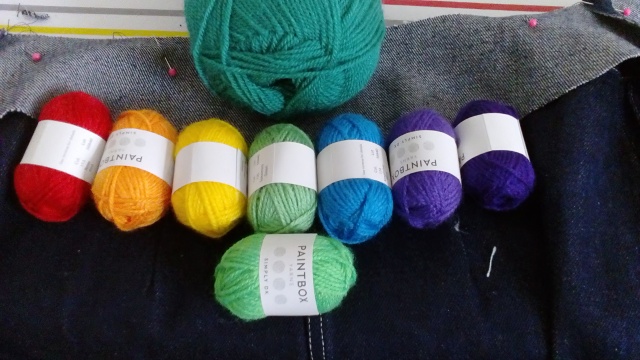
To me this seemed just a straightforward crew neck jumper. Looking at the patterns on Love Knitting I found a Breton style jumper knitted in DK. I had used the Paintbox DK yarn for my daughters jumper but even though I didn’t have a problem with it I wanted something better than 100% acrylic so I found a yarn that was 50% wool / 50% acrylic. For the rainbow stripes Paintbox do 10gm mini balls in a range of 60 colours so I picked the 7 colours of the rainbow I needed.

I wasn’t totally convinced by the knitting pattern. I thought that it wasn’t a great fit on the model, too wide across the chest but thought I could alter if necessary.

love knitting breton

The fit of this looks dodgy, especially around the neck.


I knitted up my tension square to check the gauge and I hated it. It just reminded me of something you’d knit for a baby. I also thought it was too white. So time for a re-think. I thought I needed a finer knit so looked at patterns for 4ply yarn and found another free pattern on love knitting. It’s the basic shape I was after and I could easily adjust the body length.

I sent back the white dk yarn I had bought, I had to keep the ball I had started. When I was looking at yarns I came across ‘sport weight’ which is described as somewhere between 4ply and DK and decided that this was what I needed. This time I went for a cotton yarn which gives a much smoother knit. When it arrived I knitted a tension square and was happy with the look and feel. Also by using 3mm needles I got the exact tension that was required on the pattern so I know that the my finished measurements should be the same.

guage square (1824 x 1368)

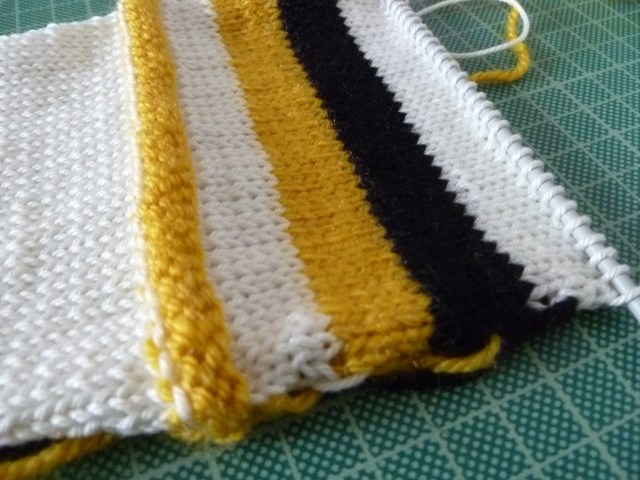
On the left is the sport weight cotton knitted on 3mm needles and on the right the 50% wool 50% acrylic DK knitted on 4mm needles


In hindsight I think the DK cotton would have work for me, the bug with knitting with the sport weight and 3mm needles is that it’s going to take longer to knit. I did even think about sending the second lot back and trying a cotton DK but as the gauge was exactly the same as the pattern I had found I decided to plough on.

I wasn’t sure if the DK mini balls would still work with the yarn but I tried 2 stripes in colours that I already had and they look fine, you can see that there is a bit more fluff in the texture but I don’t think that is a problem.

knitted stripe swatch (1824 x 1368)

I didn’t like the original green colour I ordered as it was very bright so I chose another two, one is a paler spearmint and the other a jade. I’m still not quite decided on which to use – I think I’m favouring the spearmint.

2017-04-21 10.31.28

You can’t quite tell in this photo but the green at the front is very bright and I’ve decided to use either the paler spearmint or the jade


I’ve started by knitting the sleeves together on the same set of needles and I’m nearly up to the armhole, so a few more cm and I’ll start the stripes.

My thoughts on making this swing wildly from one view to another, I either think it’s going to be horrendous or it’ll be a success and I’ll get the look I’m after. This is one of the problems with kitting, it’s going to take about 5 or 6 weeks of an hour or so every evening, it’s a time commitment and in the end it could be a damp squib.

I should be able to show you the finished sleeves next week and hopefully I’ll be in a positive mood about them! 🙂

Cotton Lawn Shirt – Burda Style 7136

It is months since I have sewn a garment. I can’t seem to run a knitting project along with sewing. The knitting takes over and time for sewing is shrunk.

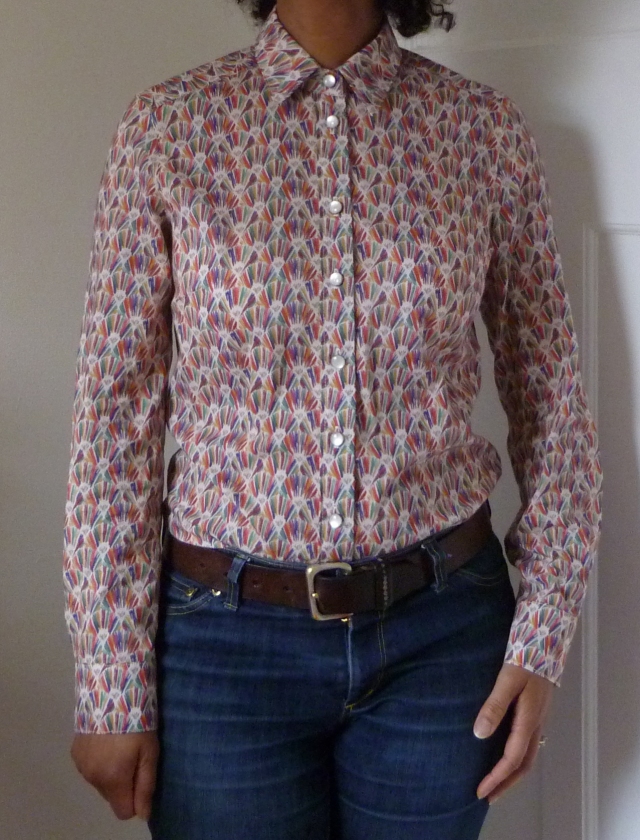
I still have sewing plans going around my head and one thing I wanted to make was a shirt. I like making shirts and I hadn’t done one for a couple of years. I was after a cotton lawn fabric and after searching the net found a design I liked on sale at Ditto fabrics for £7.50 per metre. When I cut out the fabric I did notice that further into the piece the pattern started to slope downwards, in fact I had to cut out the back piece again, luckily I had enough fabric. Maybe this was why it was a bargain price?

I used a pattern that I have used a few times before, Burda Style 7136. I have tinkered with this pattern and slimmed it down a bit but it is a bog standard shirt pattern.

I don’t seem to have the cuff placket pattern piece anymore so I drafted a new one following this link, from Emm makes Patterns. It has turned out slightly wider than I imagined but at least I know how to draft one for next time. The instructions also have a link to the Colette website for clear info on sewing your cuff placket.

shirt cuff placket (1824 x 1368)

I did the usual shirt construction with a two layered yoke and flat felled side seams from cuff to body hem.

shirt inner yoke (1824 x 1368)

One thing I did change about my pattern was the collar shape. I’m always unsure of the collar shape, usually thinking it’s too ‘winged’. I took a look at the bird print shirt that I last made with this pattern and took off some of the collar point and I’m happy with the results.

When I came to the topstitching on this garment I used my new preferred  method of two threads in the needle. This way works so much better for me than the thicker topstitching thread or the extra strong thread that I had been using. I now find topstitching so much less stressful than before!

cotton lawn shirt

Purl Alpaca Mayan Jumper – Downsized

When I was knitting the cable jumper for myself earlier this year my 9 year old was asking if I could knit her one. I couldn’t really face months of knitting another Aran jumper but didn’t want to disappoint. I had ordered myself the Mayan Jumper pattern from Purl Alpaca, I found this company from reading a post on Kate’s Fabricated blog. I showed my daughter this pattern and it was to her liking.

2017-03-27 18.59.50

With a fair bit of stocking stitch and simpler cables this looked like a reasonable quick knit. In fact I spent 5 weeks working on this, which after 3 1/2 months was a quick knit.

I didn’t go with the Purl Alpaca yarn. I didn’t want to spend a lot of money on something that she would grow out of in a year and worst of all may not even like when finished. So I went for Paintbox yarns DK acrylic from Love Knitting. I struggled a bit with it just being too cheap, 4 balls for £9 and time will tell how it washes and wears. I wasn’t sure of the colour either but as she tells me, mustard is her 2nd favourite colour.

Now I did mean to knit a tension square but completely forgot. Because I was sizing down to a 26″ chest I studied the pattern and reduced stitches accordingly and started knitting away. It was very narrow, way too narrow! I then stopped and did a tension square and realised I was going to need a lot more stitches, I also found that knitting with size 4 rather than 4.5 needles gave the stocking stitch a much neater appearance. So I needed to order a size 4 60cm circular needle. Whilst I was waiting for my new needle I started on the sleeves which I knitted two at the same time on straight needles. This helped me sort out the issue of how many stitches I needed for the body as it was easy to see on the flat knitting how wide it was working out.

2017-03-06 20.04.49

Top knitting is the first attempt, you can see how small it is! Plus I’d made a mistake in the cable which I couldn’t live with.


When I got around to starting the body for the 3rd time – second time I only had done the rib before I thought that more stitches were needed – I found that following the stitch amounts for the size M actually gave me what I wanted.

I had to think carefully about the sleeve head shape and the armhole on the body, I just couldn’t follow the pattern as  ‘knit x amount of rows’ wouldn’t have worked out with the different yarn and smaller needles that I was using. The pattern had the measurements of the armhole depth so I followed that.

When casting off the neck the pattern advises to ‘cast off loosely’. Luckily I had my wits about me and remembered the stretchy bind off I needed when I knitted a pair of toe up socks. Jenny’s surprising stretchy bind off. In this method you wrap the yarn around the needle before each stitch, the extra stretch you get is really noticeable.

cast off edges (2160 x 1620)

The top sock shows the standard cast off method and the bottom sock shows the stretch cast off method

The body up to the armhole is knitted in the round on a circular needle. This is the first time I had done this and found knitting like this quite different from having straight needles. My only issue is when you need to start a new ball. I’m not sure of the best way of finishing off and starting. I made sure the join was at the side body and I when I came to sew in all the ends I knotted and wove the loose ends in. It looks OK but not perfect from the right side as you can tell that small area is just a bit thicker. I did Google this this but didn’t come up with any solutions. So I actually would prefer a side seam to finish the loose ends.

Anyway, the customer likes it. It’s better than I thought it would be, I was worried about the width and then about the length of the arms but it’s worked out fine. It doesn’t look it’s best being modelled with a royal blue netball dress.

I think I’ll make this later in the year for myself but will probably use a better quality yarn and will definitely do a tension square first. In fact I will never knit anything again without doing a tension square first!

What to knit next. At Christmas a friend bought me the Jamie’s family superfood cookbook and there is a picture of his wife Jools wearing a white jumper with a rainbow stripe across the chest and sleeves and I’m quite taken with it. Looking closely it seems as if the white area is stocking stitch and the stripes are purl, giving a different texture. It’s a basic crew neck pattern so I shall investigate and see what I can come up with.

As for sewing, I’m finding it hard to run sewing and knitting projects along side each other but I am slowly working on a shirt which if I try could be done by the end of the week.

Adding A New Neck To The Cable Jumper – Definitely Finished This Time

When I posted about the finished jumper last week I mentioned that I wasn’t completely happy with the roll neck and was planning to knit a new piece and take the first attempt off.

For the second attempt I knitted a straight piece of ribbing, I had worked out that I needed approx. 144 stitches to get the width of neck I needed and knitted it 15cm deep. To check I was happy with the appearance I knitted the last row on to a circular needle which gave me the flexibility to wrap it around the neck on the dummy.

Then came the time consuming bit. I took off the original neck by cutting off the casting off row and unravelling, which was harder than expected and left me with lots of small bits of wool everywhere. I had to be careful and make sure I picked up all the live stitches that were at the centre front and centre back. I then had to graft the new piece on to the neckline which was still on the circular needle. It took me a while to work out the instructions for the grafting were the same as Kitchener stitch which is used for finishing off the toe when knitting socks.

That was fine for the stitches at the front and back but there were no instructions for when you are grafting with stitches on just one needle and a finished neckline but I managed to make something up that worked. Anyway, it took ages, I had to do it in two sittings. Once grafted all the way around I stitched up the seam on the neck piece and finished.

cable-jumper-complete

Last week when I put this garment on I wasn’t knocked out by it which was disappointing considering how long I’d spent knitting but I’m much happier with the look of the new neck and I’ve been wearing it over the last couple of days and I do really like it. It’s super comfy and really warm, I wore it out today in place of a coat. I really enjoyed knitting this but it was a real commitment! That was a quarter of year taken up with the making of one garment but it’s one garment I’ll probably still have in my wardrobe and wear when I am an old lady.

Now it’s done I’m going to think about sewing a few things.


Cable Knit Aran Jumper Completed

After 3 1/2 months of knitting, the jumper is finally finished. I got there in the end. I can’t even imagine how many hours have been spent on it!

2017-01-23-14-25-04

I finished last weekend and tried it on and there was something not quite right and after thinking it came down to the size of the roll neck. The jumper has a bit of an oversized fit and I think the neck is just too small. So I’m going to re-do it. There’s a story to the neck so I’ll start at the beginning.

I decided that I’d knit the neck on a circular needle so I stitched up both shoulder seams ready. The rib areas on the jumper use 3.5 needles and I had a circular needle that was 4.5 which I thought would be OK to use. So starting at the left shoulder seam I picked up and knitted the stitches I needed all around the neckline. Because I’m not knitting to any specific pattern, just merging patterns together, I didn’t really know how many stitches were required. I knitted a few rows of rib and it just didn’t look right. What I hadn’t thought about was how long the circular needle was supposed to be and I was using one that was 80cm in length. It was just a massive hoop that was way too big.

I unpicked what I had knitted and didn’t know what to do next. I regretted sewing both shoulder seams together as if I hadn’t I could have knitted on straight needles then sewn the open shoulder and side of the neck up when finished. I even thought about unpicking the left shoulder seam. I sat with the knitting on my lap with a pair of scissors in hand staring at the seam trying to decide what part was the seam stitching and what part was actual knitting. Luckily common sense prevailed and I stopped myself from doing something stupid. Before I went to bed that evening I logged onto Love Knitting and ordered a 3.5 size 50cm circular needle.

2017-01-23-14-16-20

When the needle arrived I picked up less stitches than the first time and used a whole ball of yarn to knit the neck. I would have made it a few cms longer but I wasn’t sure with knitting the rib on a circular needle how well and secure a join would be.

When it came to cast the neck stitches off I ending up doing it 3 times. First time I got half way and realised I didn’t have enough yarn left from the ball to do it. So I unpicked the cast off and knitted stitches ensuring I had enough yarn.

When I had finished I realised that I had started the cast off on the front of the neck, I thought I’d unpicked back to the left shoulder seam but obviously not. Knitting circular means there is a bit of a step which you can improve the appearance of when stitching in the ends but you wouldn’t want it in an obvious place. So had to unpick and it was 3rd time lucky.

2017-01-23-14-15-41

What am I going to do about it? Well. There is a roll neck jumper in the pattern book which suggests knitting the neck on straight needles as a piece on it’s own and then grafting it on. I did read this but I haven’t grafted before, you knit a neck trim by picking up stitches around a neckline because that’s how I’ve always done it before….and I want to do it on a circular needle.

We have a new guy in senior management who last week in a getting to know you chat mentioned how one phrase he really dislikes is “that’s how we’ve always done it before”. Yep – guilty!

So, I reference the old beige jumper that I knitted years ago which has bigger neck, it measured 60cm around the top edge. The neckline edge of my new jumper was measuring 60cm and the top opening 48cm. So to make my new roll neck piece I measured how many stitches were in 10cm of width. Which was 24 then multiplied by 60 to get 144 stitches then I added a couple on for luck. So I have started knitting a separate piece.

I haven’t taken the first neck off yet, I’ll leave it until I’m sure I’m happy with the new neck. So if all goes well I’ll have an updated jumper to show you next week.

Pattern – a mish mash of patterns from  this book of patterns from Bergere De France.
Yarn – . recycled yarn from Bergere De France ordered from Love Knitting.


Still Knitting The Jumper…And An Adapted Cowl Neck For The Sewaholic Renfrew

Happy New Year and yes I’m still knitting the jumper. The end is near, I have another 5 or 6cm to do on the sleeves and then it’s the roll neck and sewing up. I took the advice I was given and knitted the two sleeves at the same time. One set of needles, two balls of wool. Half way up the sleeves I swapped to slightly longer needles to cope with the width. 40cm instead of the 35cm I had been using. 5cm does make a bit of difference and they were only £2 to buy.

cable-sleeves

I have found that this jumper has taken over my life. I feel like I should be knitting now and not typing a post…. The sleeves have taken longer than anticipated, manly due to evenings out in the run up to Christmas and no knitting was done during Christmas week.

Knitting hasn’t left much time for sewing but I did manage to run up a Sewaholic Renfrew in November. I’ve made a few of these now but this time I wanted to alter the cowl neck line. I wanted more of a roll neck look. The neck line on the original pattern is quite wide and deep so I raised the neck line on both the centre front and back and extended the shoulder up closer to the neck. I had some polyester stretch fabric which I used for a toile, it took me a couple of tries to get it fitting how I wanted it to.

The collar piece isn’t quite a straight tube. The edge sewn to the neckline has a slight curve, just like the original pattern and the centre back seam slants outwards so the top width is slightly wider than the bottom width.

I really love the fabric and it was such a bargain. It is a wool mix, I bought it in Abakhan so I don’t know the exact fibre composition but I’m supposing it is mixed with polyester and I think there maybe some elastane in it. The piece I bought measured 2.20mts at 150wide and cost only £7.50 when weighed. It is a light weight rib construction, maybe referred to as a ‘sweater knit’ and it is seriously warm.

When doing some Christmas shopping I came across this thimble shaped desk tidy in John Lewis, I just had to have one!

2017-01-02-14-57-50

So hopefully the  jumper will be finished in the next few weeks and I can get back to making myself some new clothes. I could do with some inspiration. I popped into John Lewis last week and was seriously disappointed with the fabric offering, in the past I’ve picked up some really bargains in the sales. I was hoping for some interesting prints  but there was nothing. Every other area in the shop was busy but the fabric and yarn department was dead.

The latest Boden catalogue has just come through the door and I really like the look of the printed trousers. The fabric is cotton with 3% elastane, I remember trying to find similar printed fabric in a trouser weight last year but didn’t have much luck so if anybody knows a source I’d be grateful. I have the pattern I made for these trousers which would be perfect. I also like the printed shirts and haven’t made myself a shirt for a while so maybe that’s where I should start.